Overview
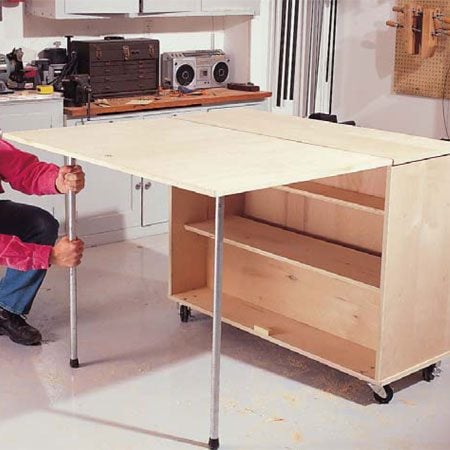
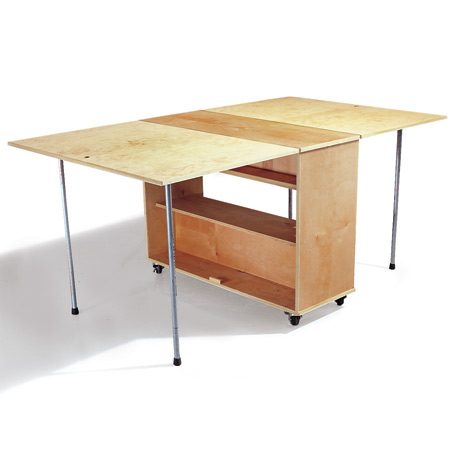
Here’s a workspace that’s huge and accessible from all sides yet folds up and stows away easily. If you don’t have room for a full-size permanent workbench but really need space to spread things out, this workbench is it. It opens to a solid 4 x 7-ft. surface with both wings up, yet closes and rolls into a small 4-ft. x 18-in. spot in a corner of the room. It’s a perfect workspace for the garage or basement. It’s also a great surface for making repairs, working on hobbies, cutting sewing patterns, wrapping gifts, folding laundry, doing stained glass crafts or even just holding a mechanic’s parts.This project has no complex wood joints. Just straight cuts, careful measuring and some nailing and screwing.
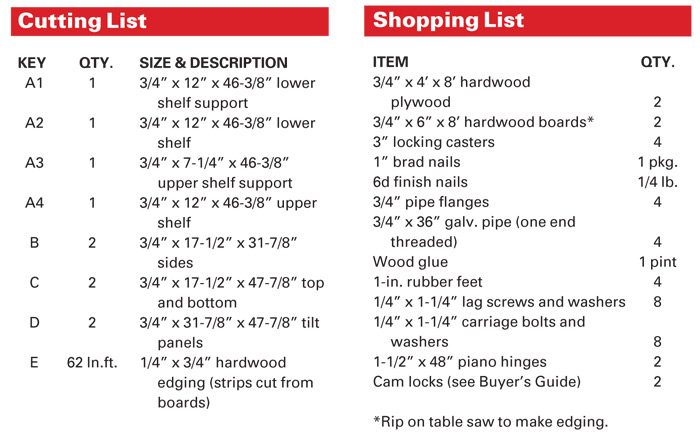
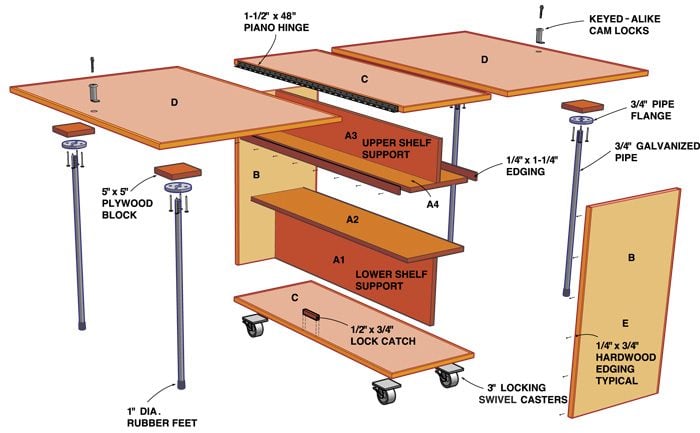
Figure A: Folding Workbench Details
With this illustration, and the Cutting and Shopping Lists, you have the basics for building your own folding workbench.You can see and print and enlarged version of Figure A and the Cutting and Shopping Lists in the Additional Information section below.
Assembly is as simple as glue and nails
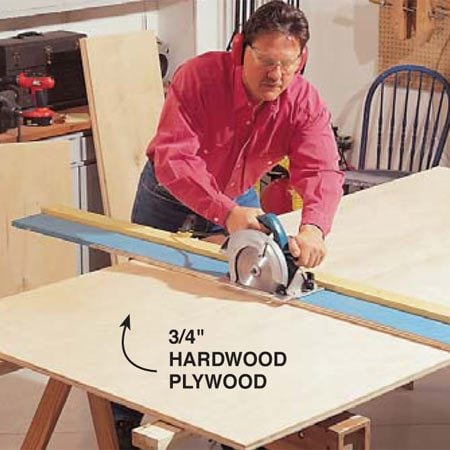
Take a look at the Cutting List and cut all your pieces from 3/4-in.-thick hardwood plywood. I used birch plywood from a home center, but any flat plywood sheet will do. Avoid construction-grade plywoods because they’ll often have bows or warps that’ll make precise fitting impossible. I strongly recommend you use a guide (Photo 1) to cut the plywood. You’ll have tighter-fitting joints and better glue bonds.
Once all the plywood pieces are cut, rip the 1/4-in. wide edge banding from 3/4-in. thick boards (or buy it precut from a home center or lumberyard if you don’t have a table saw).
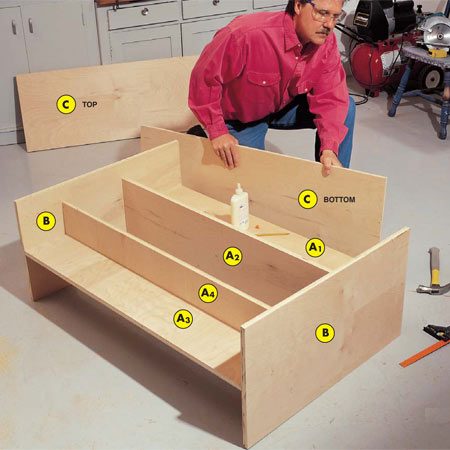
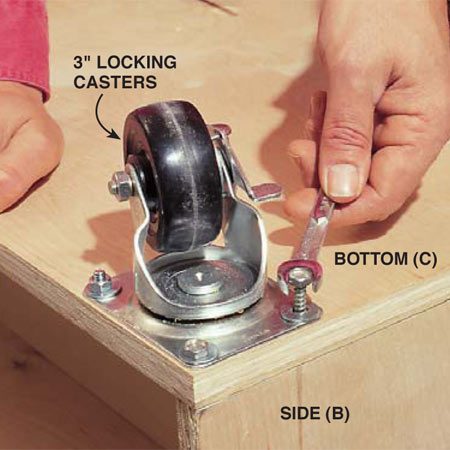
Assemble the upper and lower shelves as shown in Fig. A and Photo 2 with carpenter’s glue and 6d finish nails. Note: Don’t alter the design of the shelves for this workbench. The large shelf supports (A1 and A3) on the bottom and top of the shelves keep the bench from racking out of square. Glue and nail the sides to the shelf ends, then let the assembly sit for an hour to let the glue dry before attaching the casters as shown in Photo 3.
Use 1-in. brads for attaching the hardwood edging
The thin hardwood edging is a necessary component of the bench; without it, the hinge screws would not hold as well and the plywood could delaminate along the edges. To apply the edging, start a few brads into each piece of wood edging, put glue on the plywood and tack each piece into position (Photo 4). Once the edging is tacked in place, nail it every 6 in. with the brads. When the glue is dry, sand the sharp corners of the edging.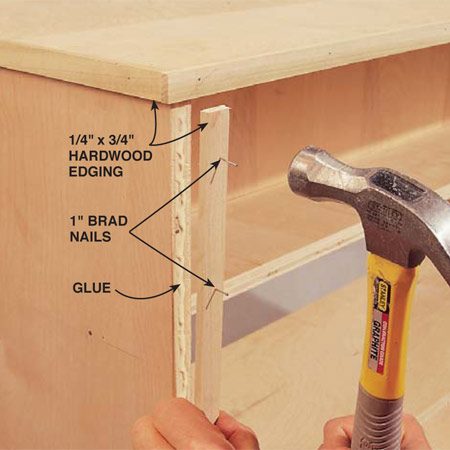
Piano hinges are the key to this bench
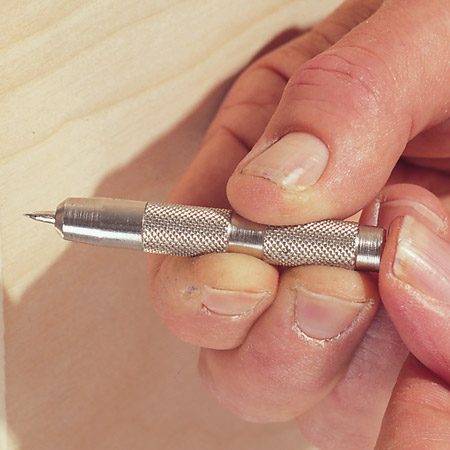
Piano hinges are a pain in the neck—all those tiny screws. But all those screws give continuous support along the joint for a sturdy worktop. Be sure to align one hinge blade with the top (C) and the other with the top of panel D. Use a hinge center punch like the one shown or a Vix bit, a special drill bit that’s self centering. Screw the hinges securely in place with the screws provided.
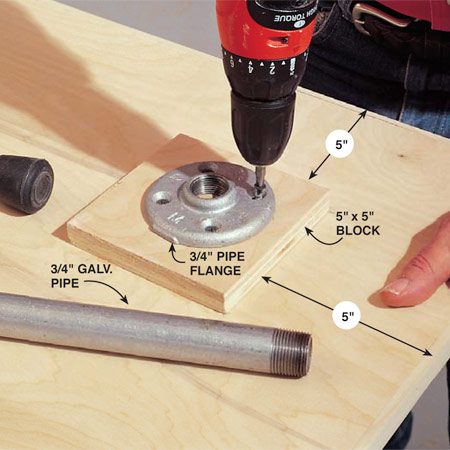


Glue and screw the blocks to the underside of each panel (D) to support the 3/4-in. pipe flanges and pipe legs. I bought 3-ft. lengths of pipe, threaded on one side, and found that I needed to cut (with a hacksaw) about 1 in. off this length. This allowed room for the flanges and the rubber feet.
The locks serve a dual purpose. First, they keep little hands from getting into things and getting pinched, and second, they’ll keep everything inside from tipping out if the bench is jarred. To install them, drill the holes for the lock (Photo 7) and glue a wooden catch to the bottom of the shelf as shown in Fig. A. Measure the shaft of the lock once it’s installed to get the correct thickness for the block. We used a 1/2-in.-thick block for ours.
Apply a finish for more color and protection
Remove the hardware to make painting or varnishing a whole lot easier. Label the panels in a hidden spot so you get the right on the right side when you assemble. Small variations from one panel to the next can show up on your hinge placement and locks.
Sand the entire bench with 150-grit sandpaper and use a power sander to knock down any high spots on the hardwood edging. Vacuum the dust, wipe the bench down with a tack cloth and apply your finish. Wait a few days after the last coat of finish to let it cure before you put your first scratches on the workbench.
No comments:
Post a Comment